Well here we go then, where to start? It seemed only fitting that the first post covers the fun I had setting up this WordPress server and site. I looked around at some of the options available, payed hosting etc and decided that “hey, lets learn something and share the experience at the same time”. Rather than manually setting up and configure the server (easy), I decided to try automate it as much as possible.
Enter Terraform…. I started looking at Terraform around 3 months ago and loved it. HCL (HashiCorp Configuration Language) was easy to follow and rather intuitive. As with a lot of technologies I find it best to have a practical use-case to experiment with so I ported my AWS test environment (combination of CF templates and PowerShell) into Terraform. I will discuss this in a separate post but the end result was two Terraform workspaces, one for the network layer and another to stand-up my Jenkins server when it was required. Another factor behind all this was cost saving, I am paying for this myself so If I can provision and destroy easily its win win.
In my quest for complete automation I still need to understand how/if I can use some of the Terraform cloud variables as AWS EC2 user_data values, maybe someone can suggest ideas here 😉
Starting out
I had decided on WordPress as the engine for this blog as it has been around a while now and is still recommended by a lot of people. I wanted the server to be hosted on my AWS account and I wanted to deploy as code. How hard could it be! oh and I wanted to keep costs down.
As my network layer was already in place I jumped straight into the code. Seeing as it should be version controlled and I wanted to leverage the remote execution capabilities of terraform.io my first step was to create a github repository to hold the code.
Creating a repository
I already have an account on GitHub and numerous private repositories so I won’t be going into that. Suffice to say it’s pretty easy to setup an account.
My repositories all have a naming standard <language/app-usage/location-activity>. In this instances I defined tf-davehart.co.uk-wordpress as the repository name and created it with a blank README.md which will be updated in due course. Pointless having code out there with no description , at my age I will forget what it’s for over time!
- Use the + drop-down menu and select New repository

- Give the new repository a memorable name
- Add a meaningful description
- Make it Public or Private
- Initialize this repository with a README
- For the sake of this example I also added a .gitignore with a Terraform template. I do not plan on initialising this locally but its just good practice.
- Click the big green button

Once the repository is created, copy the https link from the code dialog;

Microsoft Visual Studio Code
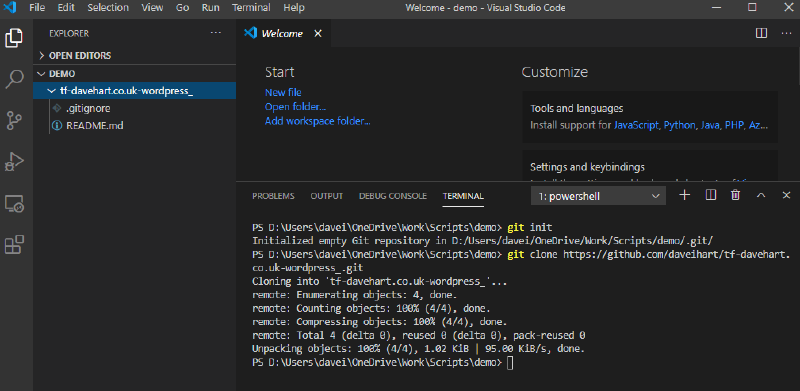
For development work I use Windows 10 with Microsoft Visual Studio Code. Depending on the use case I will either develop locally or will use a WSL deployment of Ubuntu. For this project I will just stick to local. Next task is to clone the repository we just created on GitHub using git.
- Navigate to a folder where you want to host your clone of the repository
|
|
Terraform
Now there are many ways to setup your Terraform project. I like to separate out the key sections into their own files. For this project I started with three files. You can deploy your HCL all in one file but I like to think of the possibility to expand on a project and it would be easier if you do all the groundwork from the start. This method will also make it easier to trawl through the code in smaller files should you encounter any issues.

The variables file will hold any variables required for the deployment. Hopefully the optional descriptions added will be enough
|
|
The providers file will only need to hold the AWS provider for this project.
|
|
Now here is the big one, the WordPress file. This is where all the good stuff is carried out. I am going to break this down into it’s component parts as it will be easier to explain. I will also publish this all as public GitHub repo for others to fork and play around with themselves. Best way to learn!
Lets start…
The backend is used to determine how state is loaded and how the plan and apply are executed. In this example I am using a remote backend which is Terraform cloud. My organisation has been defined and a workspace to hold the app state, runs, approvals etc.
|
|
The data sources in this deployment are defining which VPC, subnet, and AMI we will be using. When deploying the network I use the same environment code. For example we are using a VPC with the name “dev-vpc”, the subnet is the “dev-public” subnet and the ami is the latest aws-linux hvm ami using ebs type volumes.
|
|
Now we start defining our resources. First up, security groups.
The table reflects what we are looking to define
| Direction | protocol | port(s) | cidr | Usage |
|---|---|---|---|---|
| ingress | tcp | 22 | 0.0.0.0/0 | ssh access |
| ingress | tcp | 443 | 0.0.0.0/0 | HTTPS/SSL |
| ingress | tcp | 20-21 | 0.0.0.0/0 | ftp |
| ingress | tcp | 1024-1048 | 0.0.0.0/0 | ftp |
| ingress | tcp | 80 | 0.0.0.0/0 | HTTP (used for certbot) |
| egress | all | all | 0.0.0.0/0 |
|
|
Next up we define our instance. This is where we attempt to minimise any configuration post deployment by defining a lot of user_data (AWS bootstrap). I will dedicate a separate page to this and drill down into some of the other parts such as certbot and ftp. The eagled eyed will notice the odd password slipping into the user_data lines. This is next on my list of things to remove. I would like to pass these in from Terraform cloud as sensitive environment variables.
|
|
Any finally we want our new instance to be associated with a DNS name. I recently registered the davehart.co.uk domain and as I wanted to be able to programmatically update the zone I changed the DNS NS (name Servers) to AWS, first defining the zone in Route 53.
Important point to note, we are defining a record (pointer) for the root (apex) of the domain. In AWS this has to be an A-record unless you are utilising services such as AWS ELB or AWS CloudFront. I might still consume some of the services but for this initial setup the A-Record works for me.
|
|
Before we commit this code I want to setup a workspace on my Terraform cloud and integrate this with the GitHub repository. When we do then push the code to GitHub it will trigger Terraform.
GitHub & Terraform cloud
So we have already setup our GitHub repository, lets setup a new workspace on Terraform cloud to organise our infrastructure. I am not going to talk about setting up an account with Terraform cloud, just follow the link and create an account.
Once logged into app.terraform.io, click

Choose your workflow type, for this I am going to use the version control workspace. Your choice really
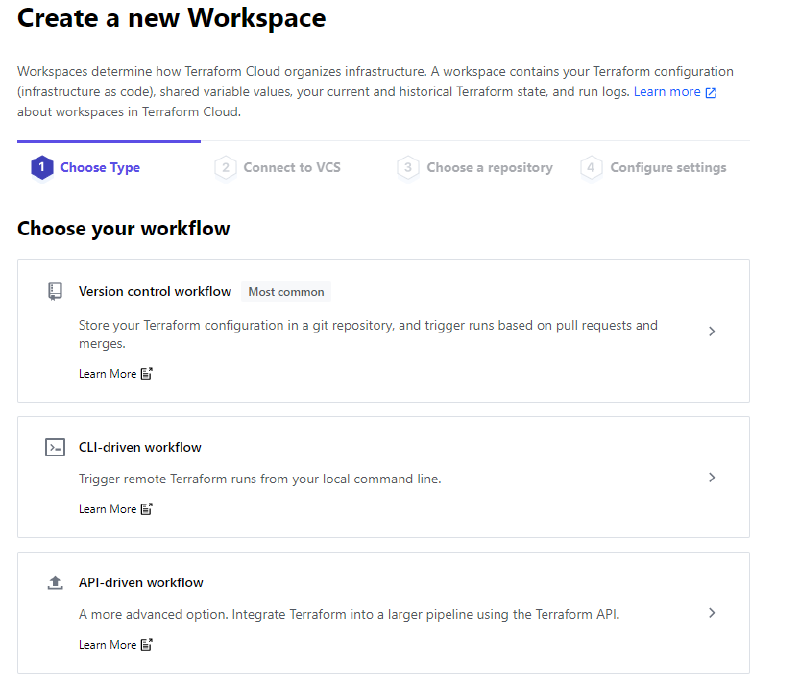
I already have GiHub integrated with Terraform so I can just select that as my VCS. Steps here if you are interested.
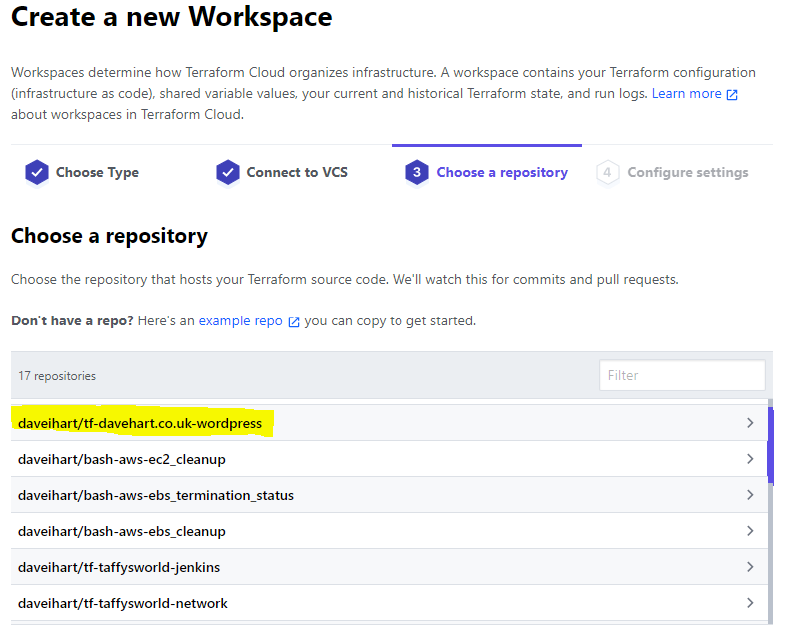
Once I select GitHub it will list all of my repositories. I have selected the one relating to this project

Once you select the Workspace you have a few options. Define the workspace name and in advanced options you can define your VCS branch, Terrform working dir, Workspace name, etc.
Click the button

All goes well you will see a message like this,

closely followed by

For this deployment I created two environment variables (secret) to hold my AWS keys. The naming is important for the AWS provider to retrieve the correct values

If we now jump back to our repository and look at the webhooks, we should see one for Terraform
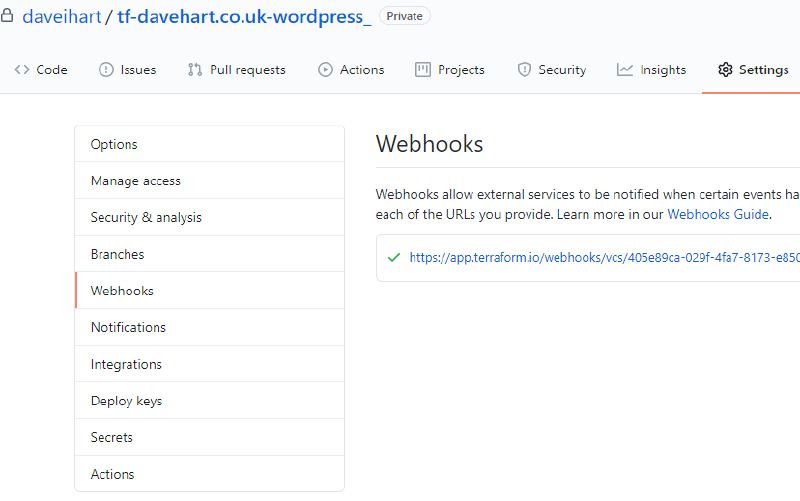
Integration complete.
Are we there yet?
Now we have our HCL code all ready to go, our GitHub repo is primed to notify Terraform of any code changes, lets get our code commited and pushed to GitHub.
Back to Microsoft Visual Studio Code and in the PowerShell terminal window (You can have VS Code do all this for you but typing the commands helps me remember them :) )
|
|

Quick refresh on our GitHub repository
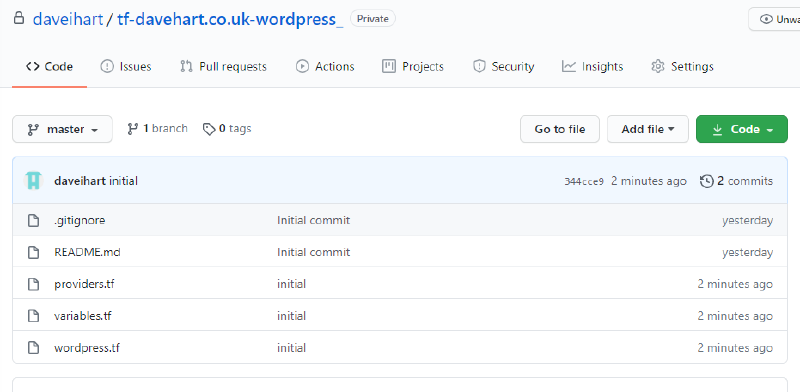
Lets see what is happening over at Terraform…Nothing. I seem to have to kick off the first plan manually. Press

Now this deployment gave me

Good reason, I did not define valid environment variables as I have already deployed this and its where I am now writing this article :)
When all the variables are correct and you have a successful run, you will see
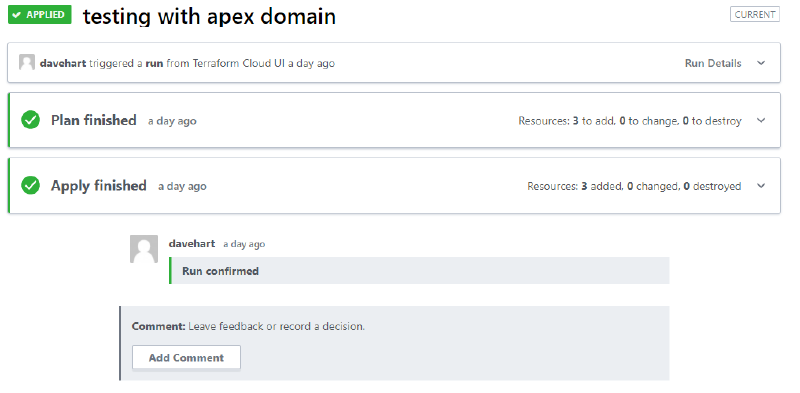
Your Terraform plans and state are all in Terraform cloud. If you want to tear it all down, navigate to settings, destruction and deletion and queue a destroy plan

I Hope you find this useful and maybe even considered dropping in again. Please take a look at Part II which will dig into some of the user_data and certbot. Great tool to allow you to automate external certificate registration and deployment.